Thrifting Thursday 4-24-14 Vintage 'Suitcase' Re-do
Hello Thrify Folks~
Today's post has that vintage vibe going on. Back in November I blogged about a cool vintage 1950's sewing machine case I came upon at the DAV thrift shop.
 I have been in a flurry lately getting ready for two outdoor shows. The latter of which is my biggest event of the year. So I thought today, I would update you on how I refurbished the case for use as a display.
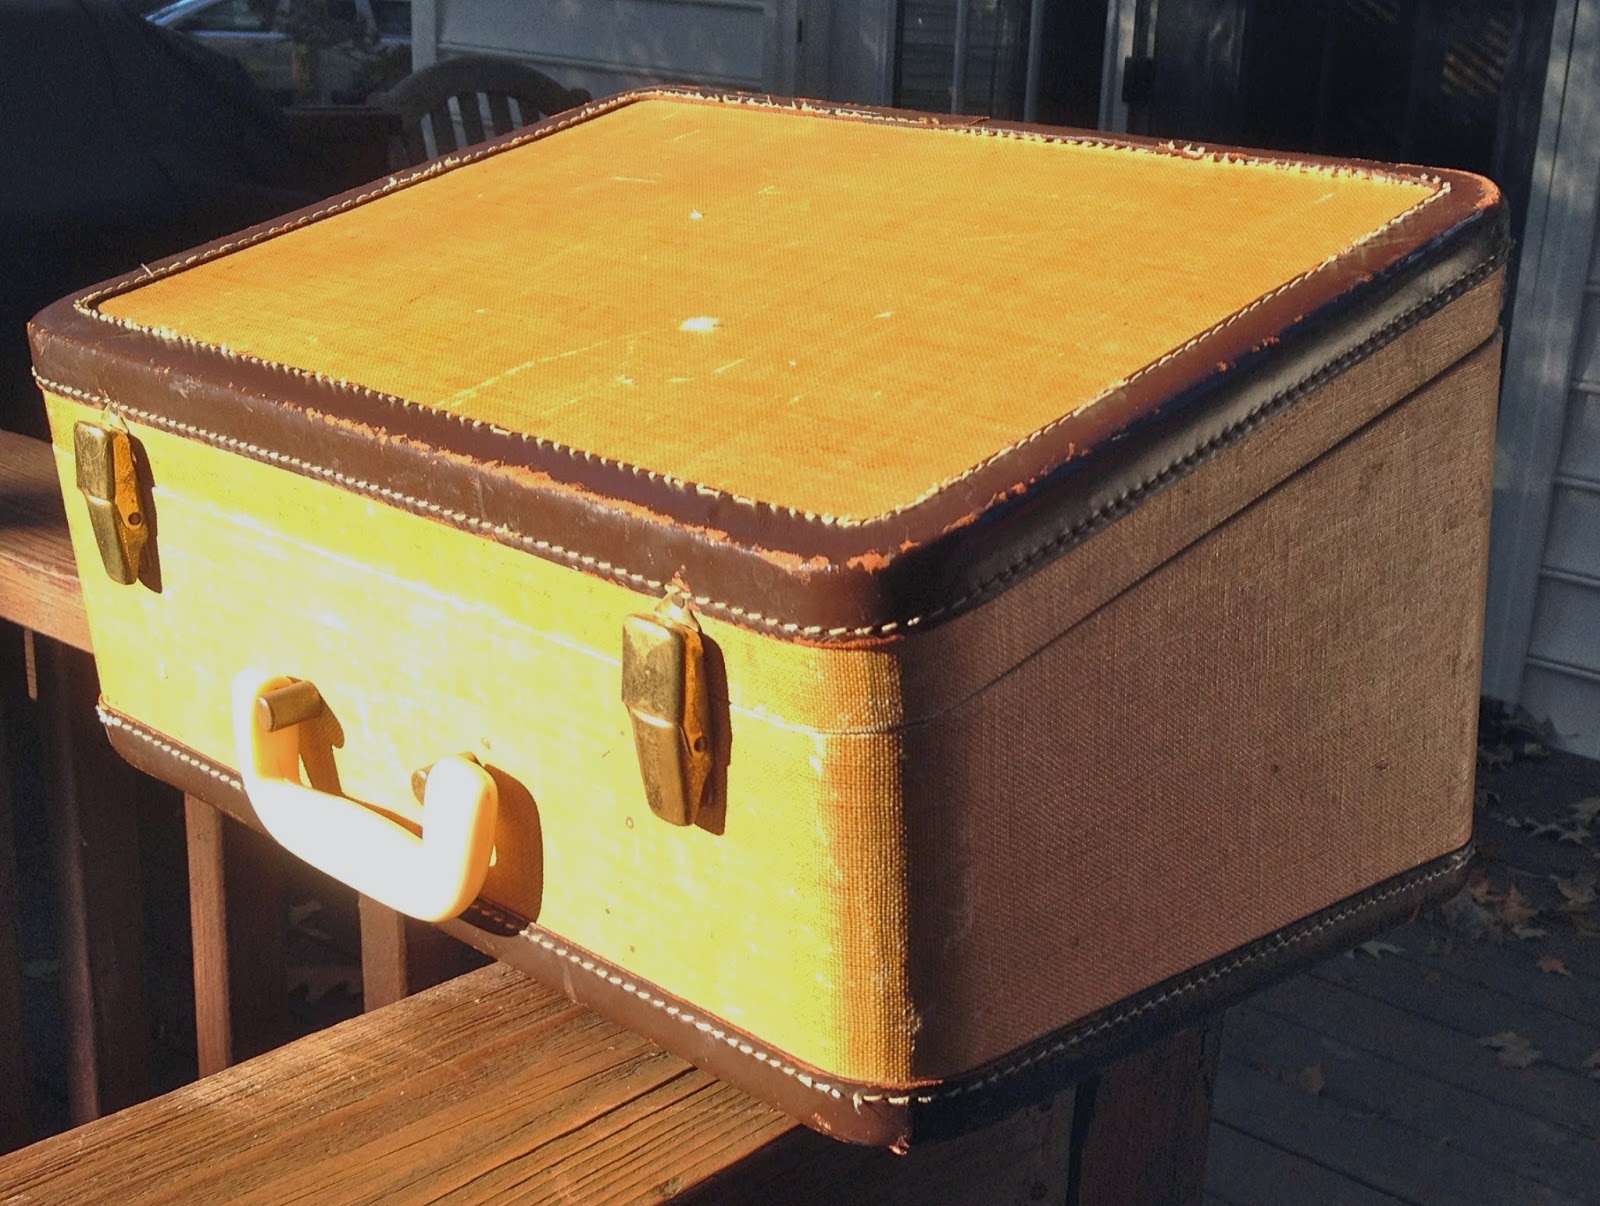
Here are the pics from purchase day. It's a bit rough and certainly was well used, but it's a cool trapezoid shape, and the price was right [$8].
So here is what I did.
First I removed the black metal hardware from the insides and wiped it down with a microfiber cloth.
If you are a regular reader, you know I have a love for natural burlap and foam core board, so once again I defaulted to those materials and cut two pieces of board to fit. The bottom piece was a bit trickier because of the wooden slats which I left in the case.
I measured out an extra long rectangular section of fabric which I cut out and then I used my trusty packing tape and attached the two pieces of board, one near the top and one near the bottom of the fabric leaving the middle 'loose'.
 Under the bottom I have used several different height configurations. I have inserted boxes of various sizes depending on what I was trying to display. For this weekends show I want to display my cuff bracelets, and so I inserted a taller box to decrease the depth and raise the platform.
Today's post has that vintage vibe going on. Back in November I blogged about a cool vintage 1950's sewing machine case I came upon at the DAV thrift shop.
 I have been in a flurry lately getting ready for two outdoor shows. The latter of which is my biggest event of the year. So I thought today, I would update you on how I refurbished the case for use as a display.
Here are the pics from purchase day. It's a bit rough and certainly was well used, but it's a cool trapezoid shape, and the price was right [$8].
 |
| A pic from another project, but you get the idea |
First I removed the black metal hardware from the insides and wiped it down with a microfiber cloth.
If you are a regular reader, you know I have a love for natural burlap and foam core board, so once again I defaulted to those materials and cut two pieces of board to fit. The bottom piece was a bit trickier because of the wooden slats which I left in the case.
I measured out an extra long rectangular section of fabric which I cut out and then I used my trusty packing tape and attached the two pieces of board, one near the top and one near the bottom of the fabric leaving the middle 'loose'.
I then pushed the top and bottom into place. I deliberately made it snug, but I did not glue it. I like to be able to change things up in the future and I can do that and because it fits tightly, but is not permanent. I tucked the long 'loose' middle section down neatly in between the edge of the board and the back of the box this gives me flexibility in future displays.
 Under the bottom I have used several different height configurations. I have inserted boxes of various sizes depending on what I was trying to display. For this weekends show I want to display my cuff bracelets, and so I inserted a taller box to decrease the depth and raise the platform.
I also added a larger mirror [$1 at Dollar Tree] for my clients, to encourage them to try things on.
I have also used my trusty drapery hooks to hang things from the top. I love this versatile little case. I hope you found this post useful.
Do you have a case you use in your display? I'd love to hear about it.
As always, THANK YOU for spending some time here today. If you are a regular follower, I truly appreciate that, if you are a new visitor to my blog, I invite you to consider joining me on my journey.
Just an easy peasy <<< click on the left and you are in!
Have a wonderful weekend and if you are in, or near Virginia Beach, VA come see me at the Thoroughgood Spring Celebration.


Great find plus it looks great for a display, will you have to worry about scratching your mirror when you close it or do you take the jewelry out?
ReplyDeleteThe mirror is not attached, so I plan to flip it over for transport so the shiny side is against the fabric.
DeleteLovely, Tammie. What a unique but inspired use of an old suitcase. I love the surprise of seeing things displayed in ways that are unexpected. May I ask a rather naive question? Where does one buy foam core? My question is naive because, as you know, I live in a highly urban area (in city of DC) and we do not have shops where one can run across some of these craft items readily. And please don't say Hobby Lobby because we have none around here (even in the exurbs)1 Well done, Tammie. I have learned so much from you!
ReplyDeleteI'm a frugal gal, I get my foam core at the Dollar Tree [for $1 lol] Any hobby or office supply shop should have it.
DeleteGreat display for your jewelry!
ReplyDeleteLove it, what a great idea!
ReplyDeleteI always love your redo's, Tammie :) Makes me want to dig out all those old cases LOL.
ReplyDeleteI don't know where you normally get your foam core, Tammie (Susan's question)... I always buy it at Staples. I would imagine most office suppliers would stock it?
Looks fantastic Tammie! Now, I'm going to have to find a suitcase or two!
ReplyDeleteFabulous transformation and what an awesome idea for re-use.
ReplyDelete(oh, and can I mention that everytime I come to your blog, it auto opens at the bottom of the page [below the comment section] instead of at the top at the header. I don't know if there's some kind of setting or something that can fix it, but I thought I would mention it.)