Greetings Friends
Sorry for the long absence from blogging~ There are only so many hours in a day and I find that these days social media takes up most of my computer time.
Regardless of that I am very excited to share my recent foray into resin poured art.
Last December I participated in an event and was positioned near a lady who made amazing resin poured oceanscapes. I was mesmerized by them and began following her on social media. I also saw her at a few more events and continued to be enthralled by her work. So, fast forward a bit, and I decide to try my hand at this technique. I watched a ton of youtube videos and read blog posts about it, checked Pinterest pages and stalked resin websites until I felt ready. I've used resin for several years with jewelry making so I understood the basic concepts well. Below I've made a series of collages that show my steps. The collage doesn't show any sanding or final finishing as I am still working on that and it may be another blog post soon. Without further ado...
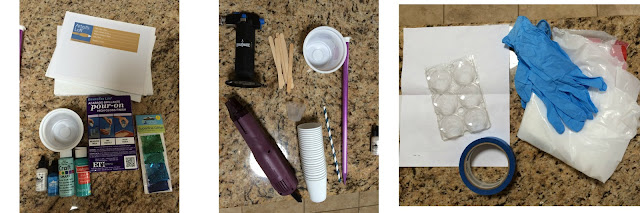 |
| Supplies: Canvas boards, two part resin, acrylic paints, alcohol ink, glitter, cups, heat gun/micro torch, stir sticks, straw, knitting needle, painters tape, gloves, garbage bag, and a support of some sort [hence the egg tray which ended up being too uneven] |
 |
| Egg tray in a big plastic bin lined with garbage bag, level and painters taped edges for one technique where resin is not allowed to drip off |
 |
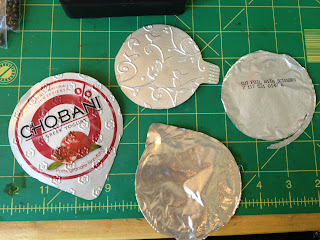
| Ended up using yogurt cups and cardboard shims to make the canvas level, taped edges |
 |
| Measure equal parts A&B , stir 2 minutes per manufactures directions, portion out resin, add drops of paint and ink to tint. |
 |
| Stir in colorants. Begin adding resin to canvas as desired |
 |
| More resin, then tilting of the entire canvas, knitting needle and straw blowing air to move resin into interesting patterns. When satisfied with design, use torch or heat gun to pop bubbles on the surface |
 |
| Allow to sit under cover [to keep dust out of the piece ] & level for 24 hours undisturbed |
 |
| Second canvas, 'Dirty Pour' method with remaining resin. Layer remaining resin into a single cup. place the canvas on top and flip cup over into your protected plastic bin. Lift cup and allow puddle to spread. Again using straw, tilting and needle to move the resin. I kept some white resin out and added more on top of the dirty pour for depth. |
 |
| Again, allow to rest while covered for 24 hours. |
 |
| Dirty Pour with dripping edges on the left /Controlled dripping with taped border on the right |
For a first attempt, I am pretty happy with these first two. It has sparked so many ideas for me. I have done a second batch which I will blog about soon and I have already bought more materials for a 3rd and 4th round.
Thanks for reading today. I hope you'll check back soon,
Warm Regards,
Tammie


Comments
Post a Comment